Omega DataCube How-To Guide:
How to View Files Backed Up With the Omega Datacube
The Omega DataCube can back up photos and other files from iPhones, iPads, and Android smartphones and tablets.
Although you cannot backup files on your laptop or desktop computer, you can view any files backed up with the Omega DataCube on any device – i.e. iOS, Android, macOS, Windows, and Linux.
There are two ways you can view what is saved on the Omega DataCube – via the Android/iOS app or with the standard operating system’s file manager (i.e. File Explorer in Windows and Finder in macOS).
1. Viewing Files Via Android/iOS App
2. Viewing Files Via File Manager
*NOTE: Depending which method you use to view files will affect to some degree the sorting and organization.
1. Viewing Files Via Android/iOS App
To view and manage files saved on your Omega Datacube with the Omega Datacube App, complete the following steps:
1. Ensure the Micro SD card is inserted into the Omega DataCube and your iPhone or iPad is properly attached to the Omega DataCube.
2. Open the Omega DataCube app.
3. Tap on “View backup content”
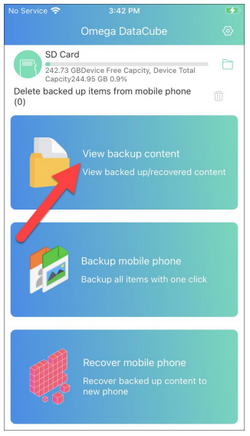
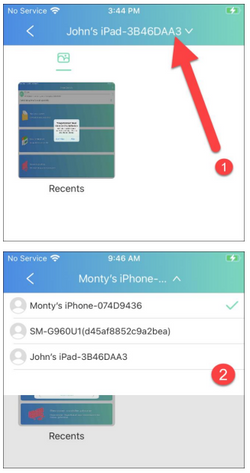
4. You can view files backed up from any device by choosing the device at the top.
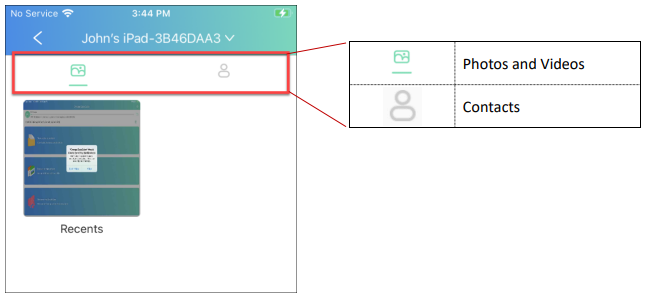
5. Then, choose to view which type of files – i.e. photos/videos, contacts.
6. Browse and view your saved files.
2. Viewing Files Via File Manager
Using the File Explorer or Finder can help you better visualize how files are saved to the Omega DataCube's SD card.
*NOTE: For this how-to guide, our Tech Pro plugged the Omega DataCube into a Windows computer, and this Omega DataCube was used to back up 5 different iPhones and an Android phone. Below are a series of screenshots of the different directories, created and organized by the Omega DataCube app when saving files.
Please also note that since the below screenshots are of the Windows File Explorer, you can sort by name, date modified, size, etc. Similar steps can also be taken when using macOS Finder.
1. Click on Omega DataCube drive (D:) that is plugged into a USB port on the Windows computer.
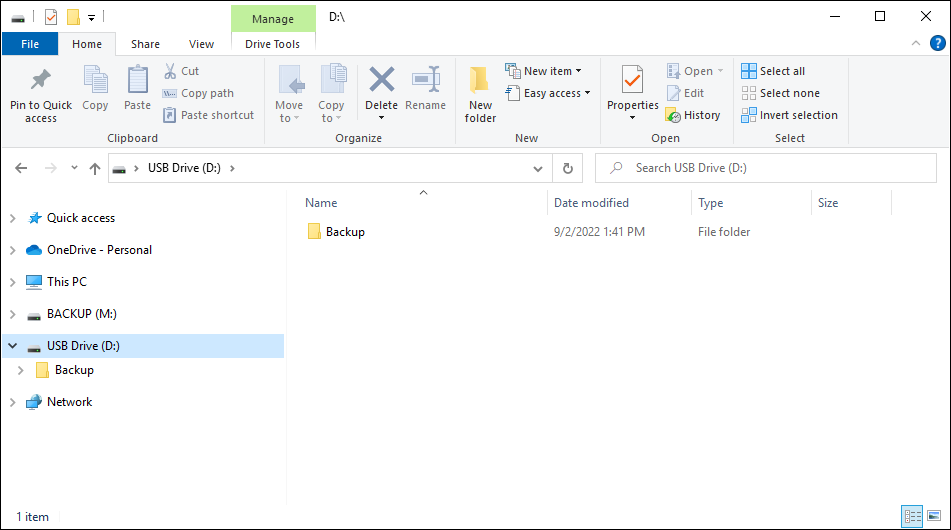
2. Double-Click on “Backup”.
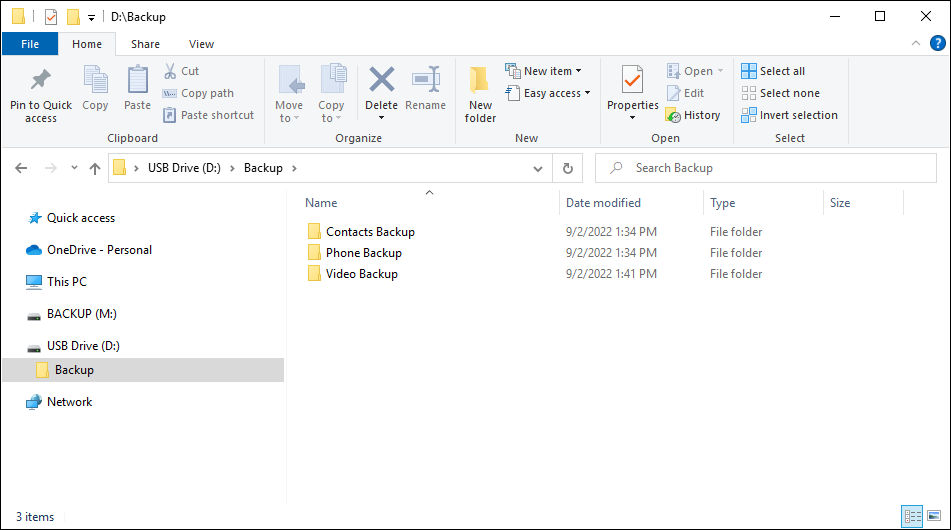
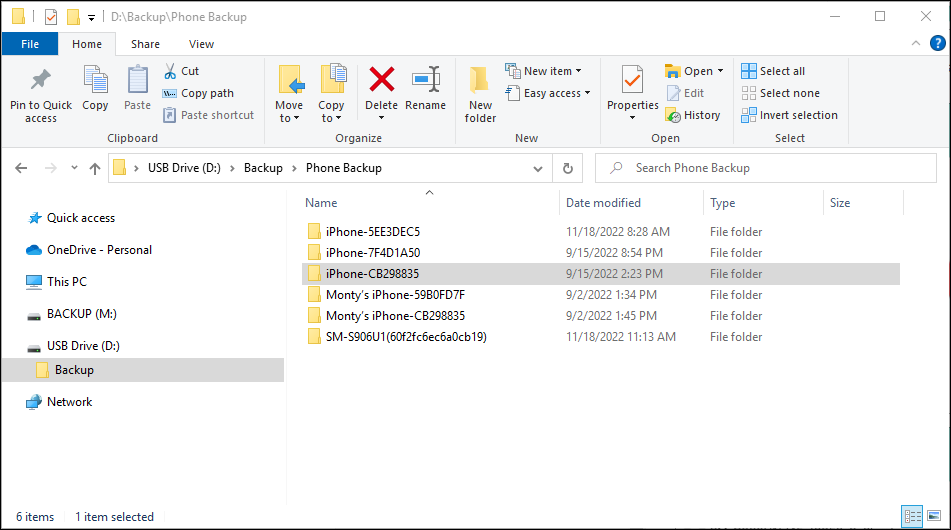
3. For photos, double click on “Phone Backup”. Here you can see that we saved photos from 5 different iPhones and an Android phone. We want to look at the photos saved from iPhone-CB298835. Note, that these directory names are the names of the user’s device. So, for example, a couple of the iPhones I had changed the name in Settings to Monty’s iPhone.
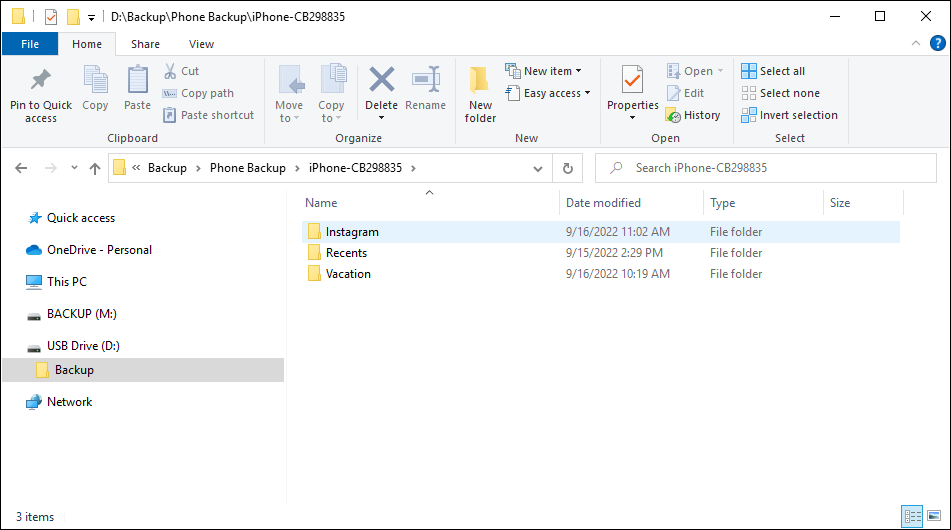
4. Double-click on “iPhone-CB298835”. Here you can see that this particular iPhone had 3 photo albums in the iPhone’s Photo app. You can see here that we save the album names that that the user has and then save files in those albums to the directories with the same name.
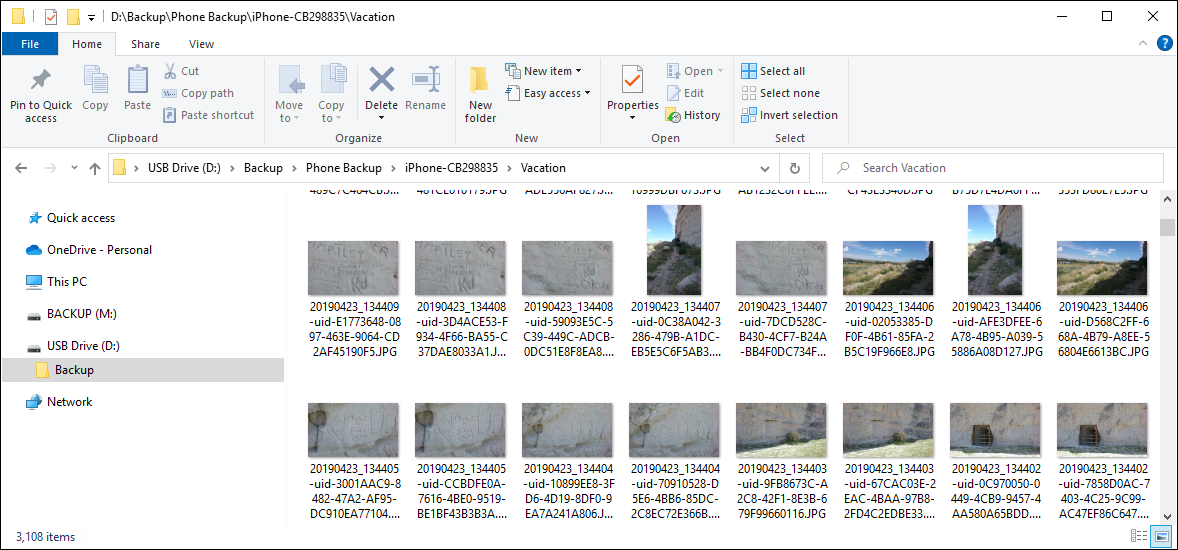
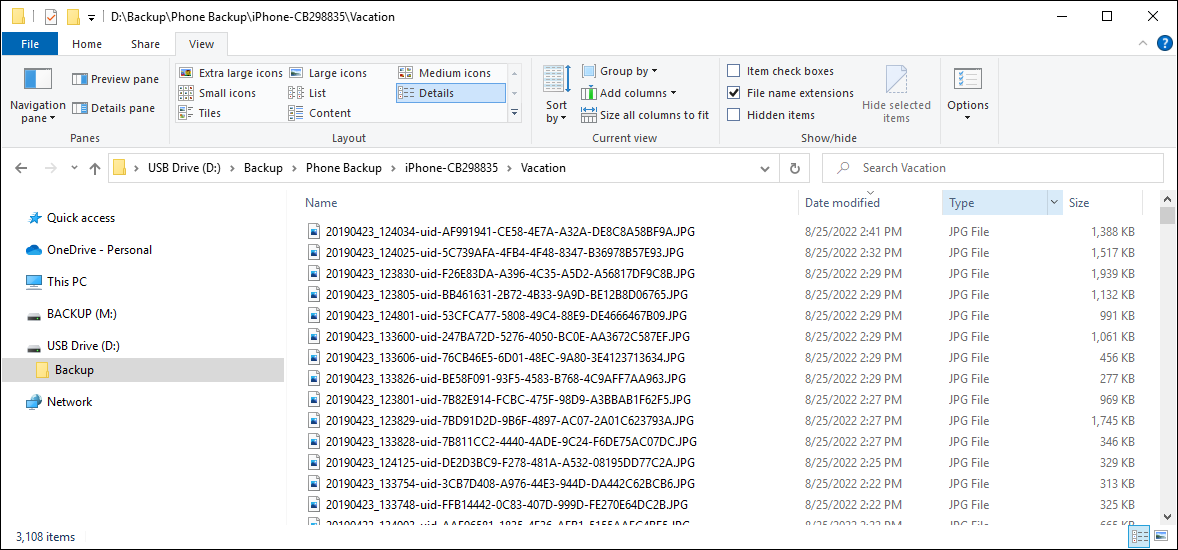
5. So, looking into the Vacation directory, we see the photos that were part of that album. And, you can see where you can sort the files by clicking on the column name if you switch from thumbnail view to detailed view.
